How To Repair Plaster Walls Efficiently – A Handy Guide
If your plaster walls are damaged, and you don’t know what to do, you’ve come to the right place. We’ll discuss how to repair plaster walls step by step to help you make your home look as good as new.
Ready to get started?
Before we begin, let’s take a moment to highlight some reasons why you should plaster the walls and why the repairing process is important.
Importance of Plastering
- Protection: Plastering acts as a protective coating for your home and helps safeguard the surface from the environment.
- Base Prep: Plastering helps to create a smooth finished surface on which you can easily apply paint or wallpaper.
- Maintenance: Plastering is an easy way to fill up and hide cracks in the structure of your home, helping to improve its value.
Can I Plaster the Walls Myself?
Before deciding on the answer to this question, you should assess the crack.
All major plaster repairs should be done by a professional plaster contractor. These qualified workers have the skill and experience to ensure your walls are repaired correctly. Some large cracks may need to be re-secured with plaster buttons and drywall screws. Others may need a lot more work, requiring a portion of the plaster to be removed before making a custom-fitted patch in the wall.
However, if you’re looking at minor plaster crack repairs, then it’s not such a difficult task. While some homeowners prefer to leave it to the experts, you can repair plaster walls easily on your own.
The key is learning how to patch plaster walls the right way. You need to be careful to prepare the walls well and follow the steps on how to repair plaster walls in the right order. This ensures your walls have a nice smooth surface, making it easier to paint or apply wallpaper.
Aren’t you excited to get started? Let’s discuss in more detail how you can repair minor cracks by yourself to welcome flawless walls.
How to Repair Plaster Walls – the important steps
Step #1: Preparing for Plastering
Plastering is a messy project, so clear the area of furniture, curtains, and belongings. If there are any sockets nearby, tape them up to prevent the plaster from getting inside.
Spread out a heavy-duty plastic sheet on the floor. You will need two sheets for this project if you plan to remove the previous plaster – one for removal and the other for applying the new plaster. Otherwise, the dust from the old plaster will contaminate the new one.
Step #2: Clean the Surface
Clean the wall thoroughly before starting. Remove the old plaster, dust, grease, or any other debris on the surface that can prevent the new plaster from adhering to the wall.
Step #3: Mix the Plaster
You’ll be using almost the same amount of dry plaster and water to prepare the plaster. So make sure the bucket is big enough to prepare the mixture.
Begin by filling the bucket with clean tap water and steadily pour the plaster into it. Add just enough plaster to form a heap on top of the water. Mix the contents evenly with a wooden stick to prevent lumps from forming. Continue to add more plaster, incorporating the dry plaster around the edges of the bucket until the mixture is of the correct consistency – a thick, creamy custard-like paste.
When preparing the plaster, remember to follow the manufacturer’s instructions carefully. And always use a clean bucket to ensure the mixture isn’t contaminated.
Step #4: Put on the First Coat of Plaster
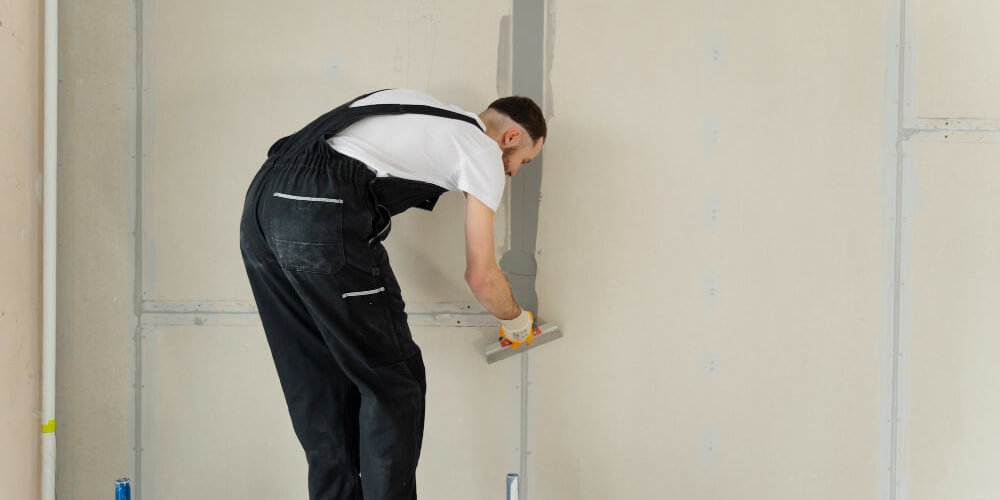
Place a small amount of the plaster onto your hawk board. Using the plastering trowel, apply a small amount of the plaster onto the wall with firm upward strokes. Begin each stroke by tilting the trowel slightly towards yourself and flattening the trowel at the end.
Follow these tips to get the best results:
- Use a small amount of plaster at a time.
- Start from the foot of the wall and work upwards.
- Use short sweeps at the beginning, ending with longer strokes to smoothen the surface.
- Spread the plaster evenly, almost 2mm thick.
- Make sure to scrape off any excess plaster.
- For slightly larger cracks, put mesh tape along the crack before applying the coat of plaster.
Once you finish applying the coat, sweep your trowel over the entire first coat to give the wall a smooth, even finish. The best results are achieved when the first coat still feels damp yet is firm to the touch. If you find the plaster isn’t moist enough, spray some water on it so that you can smoothen the surface better with the trowel. You may need to use a brush to even out the corners and edges.
Step #5: Apply the Second Coat
Wait nearly 20 minutes after you finish the first coat before applying the second one. This gives the plaster enough time to set.
Apply the second coat of plaster just like you applied the first coat. However, this time make sure to apply a thinner coat, almost 1 mm. It will help the wall look smoother, knocking out any ridges and covering up small holes.
Step #6: Polish the Plaster
The plaster will darken as it dries. Now you can polish the plaster, but don’t overdo it. The surface should feel like an eggshell. If the plaster becomes too smooth, it will be very difficult for paint or wallpaper to stick to the wall.
Once you’ve completed plastering the wall, close the bag of unused plaster. However, keep in mind that dry plaster mix will only remain good for a few weeks. So make sure to finish your crack repair project soon.
Over to You
As your home ages, you’ll need to fix the walls at some point. Knowing how to repair plaster walls can make your job significantly easier and improve the appearance of your house.
But if you don’t have enough time to do this project on your own, then don’t hesitate to call NDA Construction. We have the necessary experience and skills to repair and maintain your home. So whether you have a crumbling plaster wall, a damaged floor, or a bathroom that needs renovation, contact us and get the perfect solution that will give your home a fresh look and feel.


